Local MCP Proxy Tool
To support Stdio MCP services that need to run on the user's computer, users must download and install the Local MCP Proxy Tool from the Gendial platform.
The function of the Local MCP Proxy Tool is to act as an MCP client, communicating with the MCP services running on the local computer via Stdio, and then sending the results to the Intelligent Agent.

Installing NPX and UVX
Many local MCP services run through NPX (NodeJs) or UVX (Python). Therefore, these two runtime tools must be installed in advance.
NPX
Download and install NodeJs from the official NodeJs website: https://nodejs.org/en/download
After a successful installation, open a command prompt and run the command npx --version to see the version number.
UVX
Install UVX via the official UV website: https://docs.astral.sh/uv/getting-started/installation/
After a successful installation, open a command prompt and run the command uvx --version to see the version number.
Installing the MCP Proxy Tool
You can download and run the installer directly from the Gendial website: GendialMCPProxy_setup.exe
When running the installer, you may see the following warning messages. Please click "More Info" and then continue to run the installer.
After a successful installation, an icon for Gendial will appear in the system tray on Windows. Right-clicking the icon will allow you to access configuration options.
Configuring the MCP Proxy Tool
Right-click the Gendial icon and select Config to open the mcp.json configuration file.
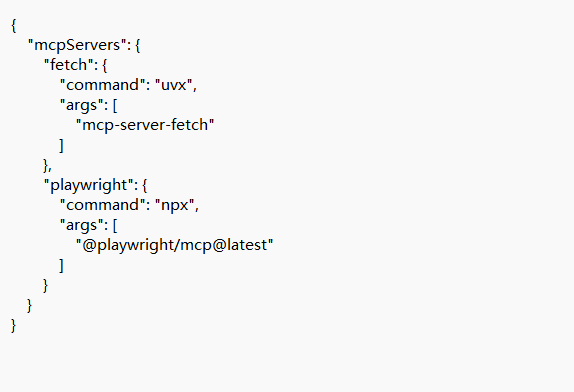
It comes pre-configured with two commonly used MCP services: fetch and playwright. If you need to add more local MCP services, you can find the corresponding services on https://mcp.so and then add the corresponding service configuration in the mcpServers object.
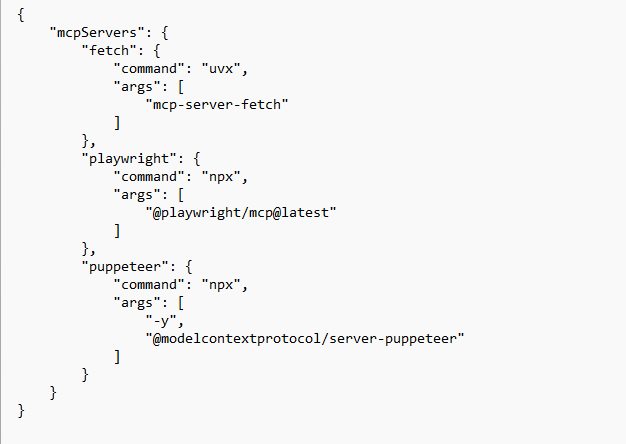
For example, if we want to add Puppeteer, an MCP service for browser control, find its corresponding Server Config settings, as shown in the red box in the image below.

Then open the mcp.json configuration file and add the corresponding settings under the mcpServers level. After adding, mcp.json should look like the image below:
Adding MCP Services on the Gendial Platform
Once the local MCP proxy is configured with the service, you can add the corresponding MCP service on the Gendial platform. Go to the Gendial platform, click MCP Service > Add MCP Server, and then set the corresponding values. Set the Server Type to Stdio (Local Computer), and set the Local Service Name to the service name you just added (for example, "puppeteer" in the example above), then click Test. The first test may take a long time because many dependencies need to be installed. Please be patient. If a timeout error occurs, try several times or add a timeout field in the corresponding MCP server configuration in mcp.json, setting the value to 300000, which is 5 minutes (the default value is 1 minute).
If the test is successful, it should display “Connection Successful” as shown in the image below.
